Export your patient list from Dentrix Ascend
Run the Patient List report and download it as a CSV.
- Dentrix Ascend open in your browser, signed in with a user who has the Patient Reports right.
On the Home menu, under Reports, click Patient List.
On older versions go to Home, then Power Reporting, open the Patient category and open the Patient List report.
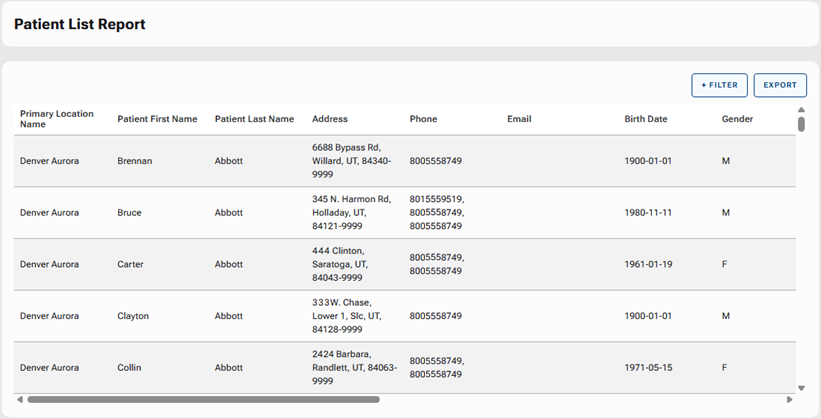
Image: Dentrix Ascend Learn. Temporary until we add our own. Click Filter. Set Patient Status to Active, and choose your Locations.
By default the list can include inactive patients and non-patients. Filter first so you only email current patients.
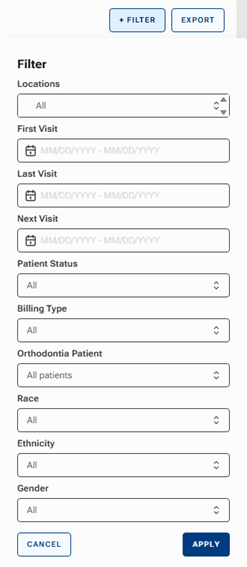
Image: Dentrix Ascend Learn. Temporary until we add our own. Click Apply.
Changing a filter does not update the list until you click Apply.
Screenshot comingClick Export. A .csv file downloads.

Image: Dentrix Ascend Learn. Temporary until we add our own. Open the file and check it has a column with email addresses and your patients' names.
If you cannot find an email column, tell us which version of Ascend you use. We will update this guide.
Screenshot coming
A .csv file with one row per active patient, including their email address.
If something looks different
- The Export button is missing
- It only shows once at least one patient is in the list. Click Apply again after you change your filters.
- Many rows have the same email
- Ascend uses the main contact's email, so a parent's address repeats for each child. ModularMail removes duplicates when you upload.
- There is no email column
- Tell us which Ascend version you use and we will find the right report for you.