Export your patient email list from Dentrix Enterprise
Make a data file of your patients' names and email addresses, then save it as a CSV.
- Dentrix Enterprise open on a computer at your practice, signed in with a user who can use Letters.
- Microsoft Excel (or similar) to save the file as a CSV.
In the Office Manager, click Letters.
Screenshot comingChoose a category (Misc. is fine), then click New.
Screenshot comingAt the top of the window, give the list a name, such as "Email list".
This saves your settings so next time you can pick the same list.
Screenshot comingNext to the template field, type any template name, for example dtxlm20.doc.
It does not matter which. We only need the data file.
Screenshot comingOn the Patient Filters tab, find Email Options under the Clinic selection and set it to Only Patients w/Email.
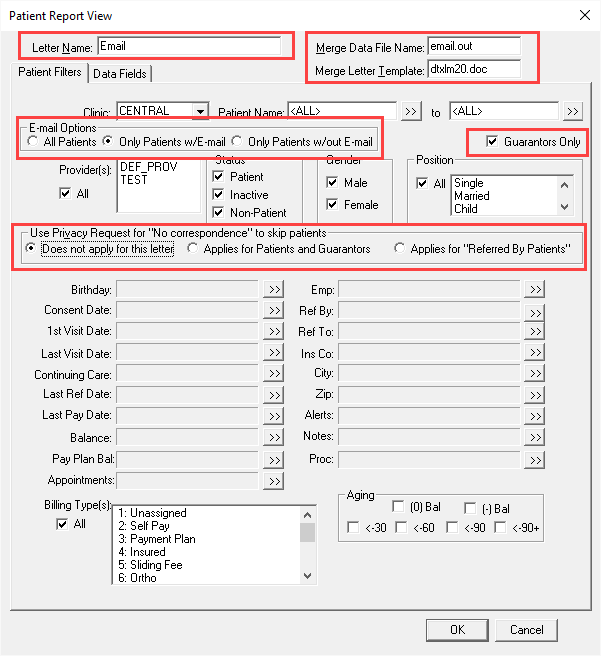
Image: Dentrix Enterprise blog. Temporary until we add our own. Still on that tab, clear the other filters. Leave Guarantors Only unticked so every patient is included.
If you want to include patients who asked for no correspondence, change "Use Privacy Request for No correspondence" to "Does not apply for this letter". Only do that if they have agreed to your newsletter.
Screenshot comingOpen the Data Fields tab. Under Patient, tick E-Mail Address, First Name and Last Name.
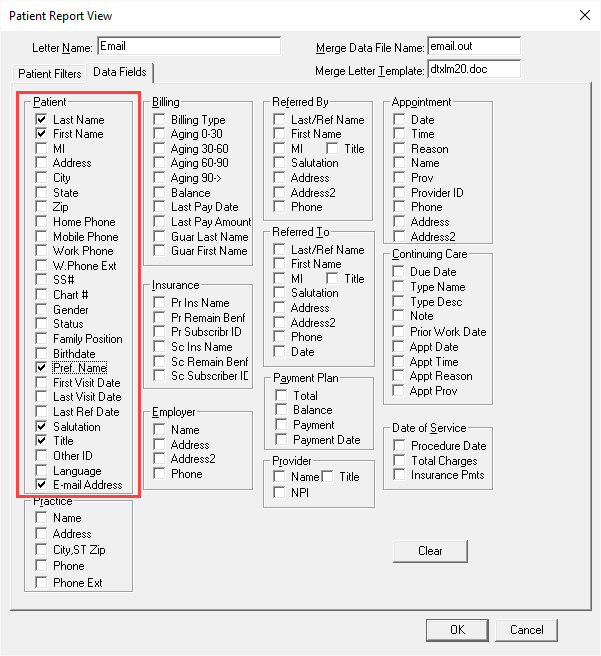
Image: Dentrix Enterprise blog. Temporary until we add our own. Click OK at the bottom of the window.
Screenshot comingWith your new list selected, click Create/Merge.
Screenshot comingChoose Create Data File Only and click OK.
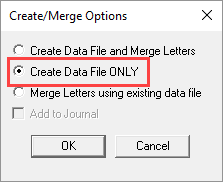
Image: Dentrix Enterprise blog. Temporary until we add our own. When Dentrix finishes checking patients, click View Location. The folder with your file opens.
Screenshot comingOpen the file in Excel. Click File, Save As, and choose CSV (Comma delimited). Give it a name you will recognise.
Check the first row names your columns, for example Email, First Name, Last Name. If it does not, type a header row in. ModularMail looks for a column called Email.
Screenshot coming
A .csv file with one row per patient. Each row has an email address, and usually a first and last name.
If something looks different
- The file has no email column or looks empty
- Go back to the Data Fields tab and check E-Mail Address is ticked. Then check Email Options is set to Only Patients w/Email.
- Everything is squashed into one column in Excel
- In Excel choose Data, then Text to Columns, and pick the separator Dentrix used (usually tab or comma).
- The same email appears several times
- Families often share one address. ModularMail removes duplicates when you upload, so you can leave them.